

Introduction to Cheesecake Fruit Salad
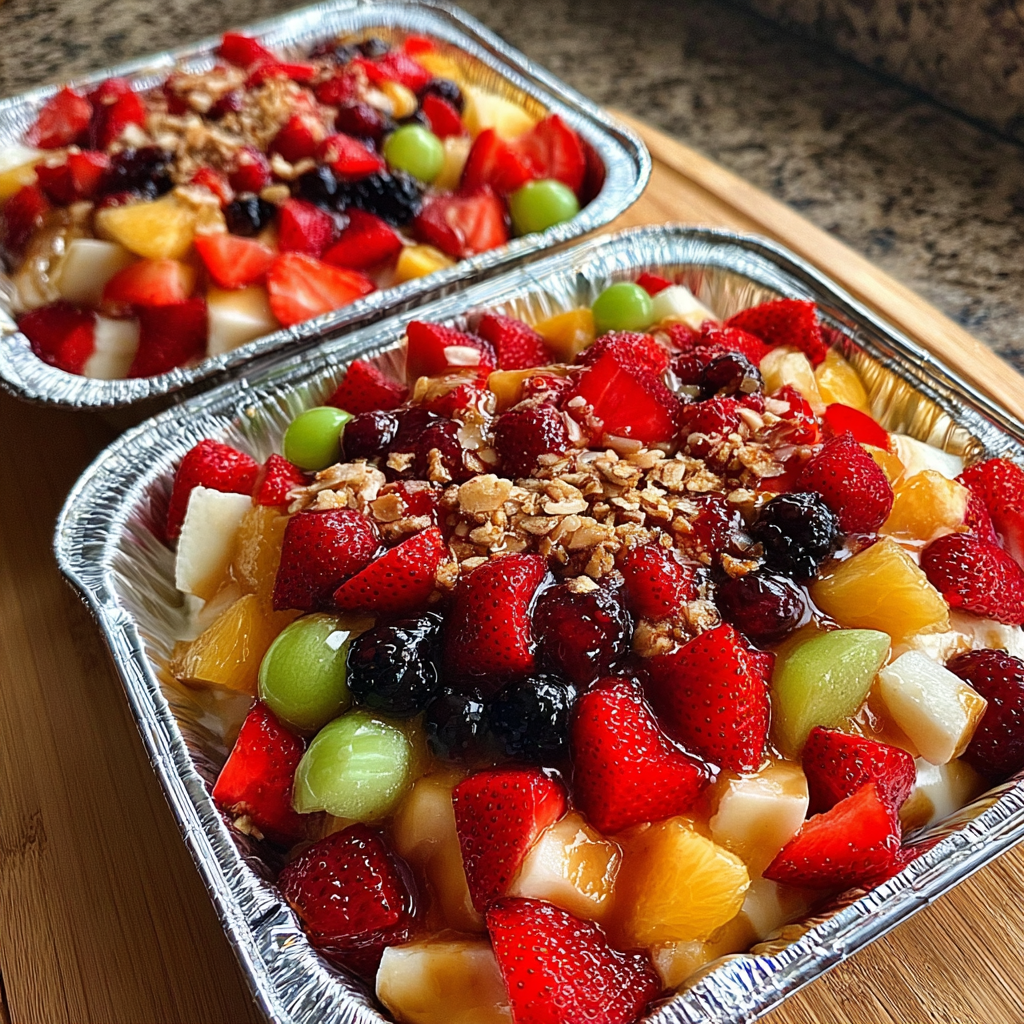
When it comes to desserts that wow a crowd without requiring hours in the kitchen, nothing beats a cheesecake fruit salad in a tin foil tray. This recipe brings together the best of two worlds: the luscious creaminess of cheesecake filling and the bright freshness of fruit salad. Packed into a lightweight foil tray, it’s not only delicious but also incredibly practical for picnics, potlucks, BBQs, or family gatherings. You can prepare it ahead, transport it with ease, and serve it straight from the tray with zero stress.
Unlike traditional cheesecakes that demand baking and careful cooling, this version is a no-bake dessert. With just cream cheese, whipped topping, sugar, vanilla, and your favorite fruits, you get all the flavor without the fuss. The beauty of this dish lies in its flexibility—you can swap in seasonal fruits, add crunchy toppings, or drizzle caramel for extra indulgence.
Food safety is also key, especially when working with fresh produce. According to the CDC’s food safety tips for fresh fruit, washing and prepping fruits correctly ensures both taste and safety. With the right approach, this dessert becomes a guaranteed crowd-pleaser—creamy, fruity, and perfectly portable in its foil tray.
What is Cheesecake Fruit Salad in a Tin Foil Tray?
AtWhat is Cheesecake Fruit Salad in a Tin Foil Tray?
At its core, a cheesecake fruit salad in a tin foil tray is a creative twist on two beloved classics: cheesecake and fruit salad. Instead of baking, this dessert combines a smooth, tangy cheesecake mixture made from cream cheese, powdered sugar, vanilla, and whipped topping, then folds in a medley of fresh fruits. The result is a dish that feels rich and indulgent yet light and refreshing at the same time.
The use of a tin foil tray makes it especially convenient. Unlike glass bowls or serving platters, foil trays are lightweight, disposable, and easy to transport. That’s why this recipe has become a go-to for potlucks, holiday gatherings, and backyard barbecues.
If you enjoy playful variations, you might also love cheesecake fruit salad roll-ups, which transform the same flavors into fun handheld bites perfect for parties.
Ingredients Breakdown
One of the best things about making a cheesecake fruit salad in a tin foil tray is how simple the ingredient list is. Each component plays a role in building flavor, texture, and presentation. Here’s a closer look at the essentials:
- Cream Cheese – The base of the cheesecake mixture. It gives the salad its signature richness and tangy flavor. Make sure it’s softened before mixing to avoid lumps.
- Powdered Sugar – Adds sweetness without the graininess of granulated sugar. It also blends smoothly with cream cheese.
- Vanilla Extract – Just a teaspoon adds depth and warmth, enhancing both the cream and fruit flavors.
- Whipped Topping – Lightens the mixture and makes it fluffy. You can use store-bought whipped topping or homemade whipped cream.
- Fresh Fruits – The stars of the salad. Popular options include:
- Strawberries (sweet and colorful)
- Grapes (juicy and easy to mix in whole)
- Apples (for crunch, though best tossed in lemon juice to prevent browning)
- Bananas (creamy but should be added right before serving)
- Kiwi, blueberries, or pineapple for variety and tropical flair
Optional Add-Ins
- Caramel Drizzle – For extra indulgence.
- Granola or Nuts – Adds crunch and contrast.
- Mini Marshmallows – A playful touch that kids love.
When choosing fruit, always aim for fresh and ripe options. Overripe fruit can make the salad watery, while underripe fruit lacks sweetness. For inspiration, check out this refreshing peach watermelon salad, which shows how fruit combinations can really shine in summer desserts.
Together, these ingredients create a balanced mix of creamy, sweet, and refreshing flavors, making this dish a true crowd-pleaser.
Tools and Materials Needed
Making a cheesecake fruit salad in a tin foil tray doesn’t require fancy equipment. With just a few kitchen basics, you’ll be ready to whip up this no-bake dessert in minutes:
- Tin Foil Tray – A 9×13-inch disposable tray works perfectly for parties and gatherings. Smaller trays can be used for family-sized portions.
- Mixing Bowls – At least two: one for the cheesecake mixture and one for prepping fruits.
- Hand Mixer or Whisk – To blend the cream cheese until smooth and fluffy.
- Spatula – For folding whipped topping and scraping bowls clean.
- Serving Spoon or Tongs – For easy scooping when it’s time to serve.
With these simple tools, you’ll have everything you need for a smooth, stress-free preparation.
Step-by-Step Recipe
Now that you’ve gathered your ingredients and tools, it’s time to assemble your cheesecake fruit salad in a tin foil tray. Follow these simple steps for a creamy, refreshing dessert that looks as good as it tastes.
Step 1: Prepare the Cheesecake Base
- Place 8 oz of softened cream cheese in a large mixing bowl.
- Using a hand mixer or whisk, beat until smooth and lump-free.
- Add ½ cup powdered sugar and 1 teaspoon vanilla extract.
- Continue mixing until the texture is fluffy and creamy.
Step 2: Fold in the Whipped Topping
- Gently fold in 1 cup of whipped topping (or homemade whipped cream).
- Avoid overmixing—this step should keep the base light and airy.
- The result is a sweet, tangy cheesecake filling that balances perfectly with fresh fruit.
Step 3: Prepare the Fruits
- Wash and thoroughly dry all fruits to prevent excess water.
- Slice larger fruits like strawberries, apples, and bananas into bite-sized pieces.
- Keep grapes whole for variety in texture.
- If using apples or bananas, toss them in a little lemon juice to slow browning.
Step 4: Assemble in the Tin Foil Tray
- Spread half of the cheesecake mixture evenly across the bottom of the foil tray.
- Add a generous layer of mixed fruits on top.
- Spread the remaining cheesecake mixture over the fruit.
- Finish with another colorful layer of fruit for a visually appealing finish.
Step 5: Chill Before Serving
- Cover the tray with foil or plastic wrap.
- Refrigerate for at least 1 hour before serving to let the flavors meld.
- For an indulgent twist, drizzle caramel sauce or sprinkle granola right before serving.
Optional Garnishes
- A sprinkle of crushed cookies for crunch.
- Mini marshmallows for extra sweetness.
- Mint leaves for a fresh, decorative touch.
With just a few easy steps, you’ll have a creamy, fruity, no-bake dessert that’s guaranteed to be a hit at any gathering.
Variations of Cheesecake Fruit Salad
One of the best parts about this dessert is how versatile it is.
- Tropical Twist – Use mango, pineapple, and shredded coconut.
- Berry Blast – Stick with strawberries, blueberries, raspberries, and blackberries.
- Holiday Style – Red grapes, strawberries, green kiwi, and mini peppermint candy.
- Healthy Swap – Replace whipped topping with Greek yogurt for added protein and less sugar.

Cheesecake Fruit Salad
- Total Time: 15 minutes + 1 hour chilling
- Yield: About 8 servings
- Diet: Gluten Free
Description
A creamy, no-bake dessert that combines cheesecake filling with fresh fruit, served in a convenient tin foil tray. Perfect for parties, BBQs, and potlucks.
Ingredients
– 8 oz cream cheese, softened
– ½ cup powdered sugar
– 1 teaspoon vanilla extract
– 1 cup whipped topping (or homemade whipped cream)
– 2–3 cups mixed fresh fruit (strawberries, grapes, apples, bananas, kiwi, blueberries)
– Optional: caramel drizzle, granola, nuts, or mini marshmallows
Instructions
1. In a large bowl, beat softened cream cheese until smooth.
2. Add powdered sugar and vanilla extract; mix until fluffy.
3. Gently fold in whipped topping to create a light cheesecake base.
4. Wash, dry, and chop fruits into bite-sized pieces. Toss apples/bananas with lemon juice if using.
5. In a tin foil tray, layer half the cheesecake mixture, then fruit, followed by the rest of the cheesecake mixture.
6. Top with remaining fruit.
7. Cover and chill for at least 1 hour before serving.
8. Garnish with caramel, granola, or mint if desired.
Notes
– Best served within 24–36 hours for freshness.
– Avoid overly juicy fruits like watermelon or citrus to prevent sogginess.
– For a lighter version, swap whipped topping for Greek yogurt.
- Prep Time: 15 minutes
- Category: Dessert
- Method: No-bake, chilled
- Cuisine: American
Nutrition
- Calories: 220
- Sugar: 22g
- Sodium: 95mg
- Fat: 11g
- Saturated Fat: 6g
- Carbohydrates: 28g
- Fiber: 2 g
- Protein: 3 g
- Cholesterol: 35mg
Storage and Make-Ahead Tips
- Refrigerate covered with foil or plastic wrap for up to 2 days.
- Avoid adding watery fruits (like watermelon) if storing overnight.
- For apples or bananas, toss with lemon juice before adding to reduce browning.
- Freezing isn’t recommended since cream cheese and fruit don’t thaw well together.
Serving Suggestions
This dessert isn’t just delicious—it’s also versatile in how it can be presented.
- Serve straight from the tin foil tray for casual gatherings.
- Transfer to a glass trifle bowl for a more formal look.
- Pair with savory dishes like grilled chicken or BBQ ribs for a perfect potluck spread.
- Add decorative garnishes like mint leaves or chocolate curls for extra flair.
For more inspiration, explore these creative serving ideas for parties.
Nutritional Information
While indulgent, this dessert can be adjusted to fit different dietary preferences.
- Calories: ~220 per serving (depending on fruit and add-ins).
- Sugar: Can be reduced with low-sugar whipped topping or sugar substitutes.
- Fat: Lower by using reduced-fat cream cheese.
Pro tip: Adding more fruit and less cheesecake base boosts nutrition without losing flavor.
Common Mistakes to Avoid
Even with an easy recipe, a few missteps can spoil the texture or flavor.
- Overmixing cream cheese → leads to lumps.
- Adding fruit too early → makes salad watery.
- Using overripe fruits → creates mushiness.
- Skipping chilling step → flavors don’t set properly.
FAQs About Cheesecake Fruit Salad ?
Can I make cheesecake fruit salad a day ahead?
Yes! Prepare the cheesecake base and cut fruit separately. Combine just before serving to prevent sogginess.
How do I keep fruit salad from getting soggy?
Drain fruits well and avoid high-water fruits like watermelon. Adding a small amount of lemon juice helps.
What fruits should I not use in cheesecake fruit salad?
Avoid overly juicy fruits like watermelon or citrus, which can water down the mixture.
Can I freeze cheesecake fruit salad?
No. Freezing causes cream cheese and whipped topping to separate, and fruits lose their texture.
Is cheesecake fruit salad gluten-free?
Yes—most versions are naturally gluten-free, but double-check flavored toppings or add-ins like granola.
Conclusion of Cheesecake fruit salad
Cheesecake fruit salad in a tin foil tray is the ultimate no-bake dessert—simple, portable, and endlessly customizable. Whether you keep it classic with strawberries and grapes or try a tropical spin with mango and pineapple, this dish guarantees smiles at any gathering.
So grab a tray, whip up the filling, toss in your favorite fruits, and let your fridge do the rest. The result? A creamy, fruity, crowd-pleasing dessert that disappears faster than you can say “cheesecake.”