

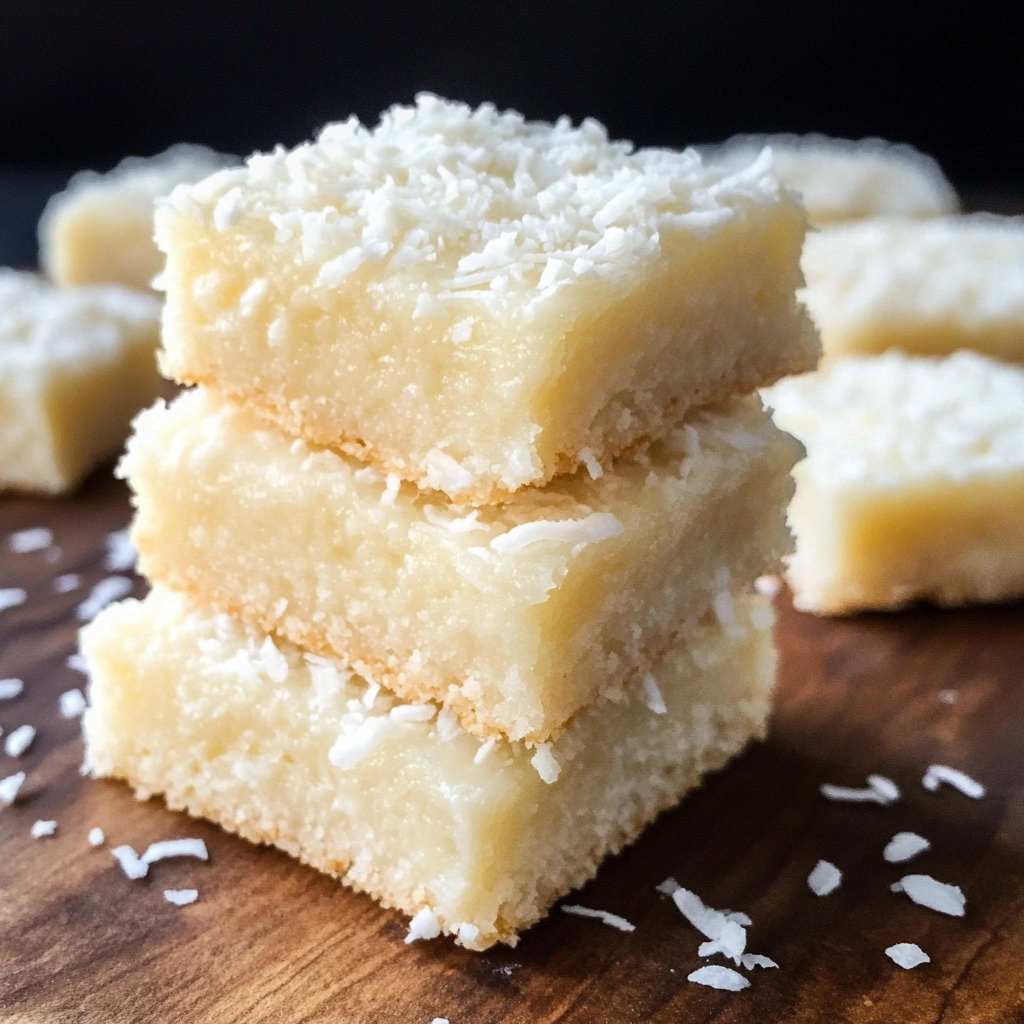
🥥 Introduction to 3-Ingredient Coconut Bars
In a world full of complicated desserts and hard-to-find ingredients, 3-ingredient coconut bars are a breath of fresh air. They’re the ultimate no-bake treat—sweet, chewy, and packed with tropical coconut flavor, all without turning on the oven. If you’re someone who loves quick recipes that still impress, this one deserves a permanent place in your kitchen.
These bars are more than just easy—they’re versatile and diet-friendly. Whether you’re vegan, gluten-free, or just trying to cut down on sugar, there are ways to adapt this simple recipe to meet your needs. And with just three basic ingredients—shredded coconut, sweetened condensed milk, and powdered sugar—you probably already have everything you need in your pantry.
Perfect for lunchbox treats, holiday platters, or lazy weekend snacking, these bars offer maximum flavor with minimal effort. If you’re already a fan of rich coconut-based desserts like Coconut Cloud Cake or Lemon Coconut Cookies, this recipe brings a simpler approach with equally delicious results.
With prep time under 10 minutes, there’s really no excuse not to try them. Let’s dive in and make your new favorite easy coconut dessert!
💛 Why You’ll Fall in Love with These Bars
If you’re a fan of quick, satisfying desserts, these 3-ingredient coconut bars will become a staple in your kitchen. Here’s why they’re so irresistible:
- Only 3 ingredients: No long shopping lists or specialty tools needed.
- No baking required: Perfect for hot days or lazy weekends.
- Customizable: Make them vegan, gluten-free, or keto with simple swaps.
- Deliciously chewy: Thanks to the perfect balance of shredded coconut and sweetened condensed milk.
- Great for all occasions: From after-school snacks to holiday gift trays.
Their simplicity doesn’t mean sacrificing taste. These bars deliver a rich, coconut-forward flavor that’s both comforting and indulgent. Plus, they store beautifully in the fridge or freezer, making them ideal for meal prep.
Looking for a dessert that hits all the right notes with half the work? These bars are it. One bite, and you’ll be hooked.
🛒 Ingredients Breakdown For 3-Ingredient Coconut Bars
One of the best parts about these 3-ingredient coconut bars is their simplicity—just three pantry staples come together to create something rich, chewy, and unforgettable. Let’s break them down:
🥥 1. Shredded Unsweetened Coconut
This is the star of the recipe, delivering that classic tropical flavor and chewy texture.
- Use unsweetened coconut to balance the sweetness from the other ingredients.
- Choose finely shredded coconut for a smoother bite, or use coarser shreds for added texture.
- Substitute idea: Desiccated coconut works well but absorbs more moisture—adjust quantities slightly.
🥫 2. Sweetened Condensed Milk
This acts as the binder and sweetener, giving the bars their soft and chewy texture.
- If you’re going dairy-free, opt for sweetened condensed coconut milk. You can even make it at home.
- For a sugar-free option, look for keto-friendly condensed milk made with erythritol or stevia.
🍬 3. Confectioners’ Sugar
This boosts the sweetness and softens the bars for a melt-in-your-mouth feel.
- Want to go low-carb? Use powdered monk fruit or erythritol instead.
- A pinch of salt or vanilla extract adds flavor depth without extra sugar.
🔄 Optional Add-Ins & Mix-Ins
You can easily personalize these bars:
- Add chopped nuts for crunch
- Stir in dark chocolate chips
- Sprinkle in toasted coconut on top
These customizations turn a simple base into something uniquely yours—all while keeping it deliciously coconut-forward.
🧑🍳 Step-by-Step Instructions For 3-Ingredient Coconut Bars
Making these 3-ingredient coconut bars is incredibly straightforward. With just a few simple steps, you’ll have a chewy, sweet, and satisfying treat ready to enjoy. Here’s a detailed walk-through:
✅ Step 1: Prepare Your Pan
- Line an 8×8-inch square baking pan with parchment paper.
- Leave some overhang on the sides to make it easier to lift the bars out after chilling.
- Lightly spray or grease the paper if needed to prevent sticking.
Tip: If you prefer thicker bars, use a smaller pan like a 6×6. For thinner bars, opt for a 9×9.
✅ Step 2: Mix the Ingredients
In a large bowl, combine the three base ingredients:
- 2½ cups shredded unsweetened coconut
- ¾ cup sweetened condensed milk (or coconut condensed milk)
- ½ cup confectioners’ sugar
Mix until a thick, sticky dough forms. Use a silicone spatula or clean hands to bring everything together.
Tip: If the mixture feels too dry, add 1–2 more tablespoons of condensed milk. If too wet, sprinkle in a little extra coconut.
✅ Step 3: Press Into Pan
- Transfer the mixture into your prepared pan.
- Press down firmly with lightly dampened hands or the back of a spoon to spread the mixture evenly and compact it.
Tip: Wetting your hands with a bit of water prevents sticking while pressing the mixture down smoothly.
✅ Step 4: Chill Until Firm
- Place the pan in the refrigerator and chill for at least 1 hour.
- The bars should feel firm to the touch and hold their shape when sliced.
Tip: For faster results, you can chill the bars in the freezer for about 25–30 minutes.
✅ Step 5: Slice and Serve
- Remove the chilled slab from the pan using the parchment overhang.
- Slice into squares or bars using a sharp knife.
- For clean edges, run the knife under hot water, wipe dry, and slice—repeat as needed.
Tip: Let bars sit at room temperature for 5–10 minutes before cutting to avoid cracking.
🧠 Pro Tips for Perfect Texture
- Let bars warm slightly before slicing
- Toast coconut for extra flavor
- Add a pinch of sea salt for contrast
- Optional: add vanilla extract or maple syrup
🌈 Tasty Variations to Try
While 3-ingredient coconut bars are amazing on their own, they’re also incredibly versatile. Whether you’re craving a richer dessert or want to add a fun twist, these variations let you customize to your taste—without compromising on that signature chewy coconut texture.
🍫 1. Chocolate Drizzle or Dip
Add a sweet contrast with a chocolate layer.
- Drizzle melted dark or milk chocolate on top of the chilled bars.
- For extra indulgence, dip the base of each bar in chocolate and let set.
Pair this version with other no-bake chocolate favorites for a decadent dessert spread.
🥥 2. Toasted Coconut Topping
Take the coconut flavor up a notch!
- Toast a handful of shredded coconut in a dry pan.
- Sprinkle on top before pressing the mixture into the pan.
🍪 3. Graham Cracker Crust
Add crunch and a cookie-like vibe.
- Mix 1 cup graham cracker crumbs, 2 tablespoons coconut oil, and 1 tablespoon brown sugar.
- Press into the pan as a crust before adding the coconut mixture.
🥜 4. Nutty Add-ins
Perfect for texture lovers.
- Fold in chopped almonds, pecans, or cashews for a crunch boost.
💪 5. Protein-Packed Snack
Turn your bars into a healthy snack.
- Add 1 scoop of vanilla or coconut-flavored protein powder.
Or try these protein-packed snack ideas for more high-energy options!
🧊 Storage & Freezing Instructions
One of the best things about these 3-ingredient coconut bars—besides how easy they are to make—is how well they store and freeze. You can prep them in advance and always have a sweet, coconutty treat ready to enjoy.
🧺 Refrigerator Storage
- Place bars in an airtight container with parchment paper between layers.
- Store in the fridge for up to 2 weeks.
❄️ Freezer Storage
- Wrap each bar individually in parchment paper or plastic wrap.
- Place wrapped bars in a freezer-safe ziplock bag.
- Freeze for up to 6 months.
- To serve, thaw in the refrigerator overnight or at room temperature for 20–30 minutes
☕ Serving Ideas
- Pair with coffee or tea
- Use as party favors or holiday treats
- Serve chilled on dessert platters
- Gift in jars with ribbons
FAQs About 3-Ingredient Coconut Bars❓
Curious about how to tweak or store your 3-ingredient coconut bars? Here are answers to the most commonly asked questions from home bakers just like you.
Are 3-ingredient coconut bars healthy?
Yes—especially when made with unsweetened coconut and low-sugar ingredients. Coconut provides healthy fats and dietary fiber, making these bars a better-for-you option than many store-bought sweets. Want to boost the nutrition further? Add chia seeds or protein powder.
Can I make coconut bars without condensed milk?
Technically no—condensed milk is key to binding the bars and adding sweetness. However, you can use sweetened condensed coconut milk for a vegan twist, or make your own at home. Check out this DIY coconut condensed milk recipe for a cleaner, dairy-free version.
How can I make these bars sugar-free?
Simple! Use:
Can I use desiccated coconut instead of shredded?
Absolutely. Desiccated coconut is drier and more finely ground, so you may need a bit more condensed milk to achieve the same sticky texture. Always use unsweetened versions for best results.
Why are my coconut bars crumbly?
- Adding more condensed milk one tablespoon at a time
- Pressing more firmly into the pan
- Letting them warm to room temperature before slicing
How long do coconut bars last in the fridge or freezer?
- In the fridge: up to 2 weeks
Discover How to Make Sweetened Condensed Coconut Milk
🍊 Looking for More Citrus-Inspired Treats?
Try these bite-sized citrus desserts like Orange Creamsicle Truffles. Perfect for adding variety to your sweet snack lineup.
🔑 Final Thoughts
Craving more? Explore related recipes like Coconut Cloud Cake or try Lemon Coconut Cookies for a tangy twist. These bars are just the beginning of your coconut journey!